Tutorial 2 - IO
This tutorial will show how Behavior Graph interacts with real inputs and outputs to produce a working application. In this case we will build the control system for a thermostat, the device in your house that controls the heat.
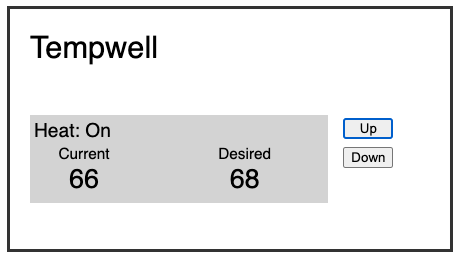
This simplified thermostat has two buttons, Up and Down for raising and lowering the desired temperature. It also periodically gets external updates of the current temperature. If the desired temperature is above the current temperature, we will turn on the heat. And once they are the same, the heat will turn off.
Initial Code
The recommended way to get started is to use our preconfigured tutorial site.
You should use that for this tutorial.
It has some existing Swing code to represent the Thermostat’s user interface.
If you wish to use your own environment you will need to copy the three .java files from our tutorial site.
The initial setup code has been provided for you.
There is a Main.java which creates the core objects.
There is also a TutorialUI.java file which contains the Swing UI code.
(It is just simple enough to let us explore Behavior Graph features.
Do not use it as an ideal example of a Swing application).
The bulk of our application will exist inside our Thermostat.java file. It contains a subclass of Extent.
import behaviorgraph.Extent;
import behaviorgraph.Graph;
import behaviorgraph.Moment;
import behaviorgraph.State;

public class Thermostat extends Extent<Thermostat> {

  TutorialUI ui;

  public Thermostat(Graph g, TutorialUI uiParam) {
    super(g);
    ui = uiParam;


  }
}
Note here that we subclass Extent. In the previous tutorial we used an Extent instance directly. The standard approach is to build your application out of Extent subclasses like we do here.
Also note that Extent takes a type parameter of our subclass.
In this case it is Thermostat.
This gives us a more convenient API to work with.
You should follow this in your own subclasses.
We also store a reference to the user interface object passed in to our constructor.
Desired Temperature
The first part of our logic will focus on setting the desired temperature. The related elements look something like this.

First we need a state resource to track our desired temperature and a behavior to supply it.
public class Thermostat extends Extent<Thermostat> {

  State<Integer> desiredTemperature = state(60);

  public Thermostat(Graph g, TutorialUI uiParam) {
    super(g);
    ui = uiParam;

    behavior()
      .supplies(desiredTemperature)
      .runs(ext -> {
        // desired temperature logic will go here
      });

  }
}
We create a desiredTemperature property and initialize it using the state() factory method on Extent which we subclass. desiredTemperature is a state resource with an initial value of 60.
It has a generic type of Integer.
(Remember that Java can only do generic on object types, but it will do autoboxing for us.)
We want a state resource because it is information we intend to use in the future.
Our new behavior supplies this resource because we plan on calling desiredTemperature.update() inside the runs block.
Button Presses
Our thermostat will need to respond to the button press events that come from our Swing UI buttons.
public class Thermostat extends Extent<Thermostat> {

  TutorialUI ui;
  State<Integer> desiredTemperature = state(60);
  Moment up = moment();
We create an up moment resource to track when the Up button is pressed.
It is a Moment resource type (as opposed to State) because we are tracking a one off event, the pressing of a button.
It is no longer relevent once we’ve finished responding to it.
  public Thermostat(Graph g, TutorialUI uiParam) {
    super(g);
    ui = uiParam;

    ui.upButton.addActionListener(e -> {
      up.updateWithAction();
    });

    behavior()
Then we use standard Swing functionality to respond to the button click action.
We call up.updateWithAction() to track this event in our moment resource.
.updateWithAction() is syntactic sugar for creating a new action and calling .update().
It is the same as if we typed this instead:
    ui.upButton.addActionListener(e -> {
      action(ext -> {
        up.update();
      });
    });
Responding to the Button
We need to modify our behavior to respond to this update.
    behavior()
        .supplies(desiredTemperature)
        .demands(up)
        .runs(ext -> {
          if (up.justUpdated()) {
            desiredTemperature.update(desiredTemperature.value() + 1);
          }
        });
We add up to our list of demands.
This ensures that this behavior activates whenever up is updated.
Inside the run block we check for .justUpdated().
If so, we update the desiredTemperature by incrementing it from its previous .value().
Access Rules
- You can only access
.justUpdated()inside behaviors that demand (or supply) that resource. Otherwise Behavior Graph will raise an error. - You can only access
.value()inside behaviors that demand (or supply) that resource. Otherwise Behavior Graph will raise an error. - You can only call
.update()inside a behavior that supplies that resource. A resource can only be supplied by one behavior. Behavior Graph will raise an error if you do this incorrectly.
These rules are essential to allowing Behavior Graph to ensure your resources are always in a consistent state.
Output
At this point our desiredTemperature changes when you press the Up button.
But we don’t update the display, yet.
We will add that here.
    behavior()
      .supplies(desiredTemperature)
      .demands(up)
      .runs(ext -> {
        if (up.justUpdated()) {
          desiredTemperature.update(desiredTemperature.value() + 1);
        }
        sideEffect(e -> {
          ui.desiredTemp.setText(desiredTemperature.value().toString());
        });
      });
This behavior creates a Side Effect block. Inside that block we use standard Swing methods to update the temperature. Now if you run this and click on the Up button you will see the temperature field appear and increment.
Side effects are the correct way to generate output from inside a behavior. Although a side effect is created inside a behavior, it will only run after all other behaviors have completed running. This ensures that all our internal state has settled before calling code that may potentially access it.
Side effects do not have a restriction on what resources they can access, unlike the behavior in which they are defined.
Down
We can handle our Down button in a similar way.
We add a down moment to track the button.
public class Thermostat extends Extent<Thermostat> {

  TutorialUI ui;
  State<Integer> desiredTemperature = state(60);
  Moment up = moment();
  Moment down = moment();
Then a Swing listener to create an action.
    ui.upButton.addActionListener(e -> {
      up.updateWithAction();
    });

    ui.downButton.addActionListener(e -> {
      down.updateWithAction();
    });
And modify our behavior to respond.
    behavior()
      .supplies(desiredTemperature)
      .demands(up, down)
      .runs(ext -> {
        if (up.justUpdated()) {
          desiredTemperature.update(desiredTemperature.value() + 1);
        } else if (down.justUpdated()) {
          desiredTemperature.update(desiredTemperature.value() - 1);
        }
        sideEffect(e -> {
Note that we added down to the list of demands.
And we added additional logic to decrement our desired temperature when the down button is pressed.
Run the program. Clicking on the Up and Down buttons should now move the desired temperature display up and down.
Run when Added
You may have noticed that the desired temperature display doesn’t show up until after we’ve tapped on one of the buttons. This is because our behavior only runs when one of its demands is updated. What we would like to do is also run it once at the beginning.
The getDidAdd() method on extent returns a special resource associated with that extent.
We add it to our list of demands.
    behavior()
      .supplies(desiredTemperature)
      .demands(up, down, getDidAdd())
      .runs(ext -> {
        if (up.justUpdated()) {
          desiredTemperature.update(desiredTemperature.value() + 1);
Now when you run the code you will see that the temperature also appears at the beginning.
getDidAdd() is a getter method on Extent (which we subclass). It returns a State<Boolean> resource that becomes true during the event that the extent is added to the graph. We add this resource to our list of demands.
So our behavior will also run once at the beginning.
getDidAdd() returns a normal resource.
You can use it anywhere in your behavior’s logic as well, such as checking getDidAdd().justUpdated() to customize your logic.
Heat
Now we need to introduce a separate bit of functionality to control the heating equipment. This logic compares the current temperature to the desired temperature and turns on or off the heating equipment accordingly.

Current Temperature
First we need a state resource to track the current temperature,
  State<Integer> desiredTemperature = state(60);
  State<Integer> currentTemperature = state(60);
  Moment up = moment();
and a new behavior to update the UI when that resource updates.
        sideEffect(ctx1 -> {
          ui.desiredTemp.setText(desiredTemperature.value().toString());
        });
      });

    behavior()
      .demands(currentTemperature, getDidAdd())
      .runs(ext -> {
        sideEffect(e -> {
          ui.currentTemp.setText(currentTemperature.value().toString());
        });
      });
Like with desiredTemperature this behavior runs whenever currentTemperature updates as well as once when it is added.
It uses a side effect to update our Swing UI.
Heat On
Next we need a resource to track if the heat is on or not.
  State<Integer> currentTemperature = state(60);
  State<Boolean> heatOn = state(false);
  Moment up = moment();
By default the heatOn state resource is false indicating that it is off.
Now we want to add another behavior to determine if the heat is on.
        sideEffect(e -> {
          ui.currentTemp.setText(currentTemperature.value().toString());
        });
      });

    behavior()
      .supplies(heatOn)
      .demands(currentTemperature, desiredTemperature)
      .runs(ext -> {
        boolean on = desiredTemperature.value() > currentTemperature.value();
        heatOn.update(on);
      });
This new behavior is responsible for updating heatOn so we add it as a supply.
It uses both currentTemperature and desiredTemperature for its logic, so both are demands.
When it runs, it updates heatOn to true if our currentTemperature is too low.
Heat Display
We want our display to update alongside the heatOn.
So we add that logic to our new behavior.
    behavior()
      .supplies(heatOn)
      .demands(currentTemperature, desiredTemperature, getDidAdd())
      .runs(ext -> {
        boolean on = desiredTemperature.value() > currentTemperature.value();
        heatOn.update(on);
        sideEffect(e -> {
          ui.heatStatus.setText("Heat " + (heatOn.value() ? "On" : "Off"));
        });
      });
We demand getDidAdd() to ensure we update the display when the thermostat starts.
We also add a side effect to update the UI.
Run it. Now when you click the Up and Down buttons you should see the heating display change based on desiredTemperature changes.
Heating Equipment
In a real thermostat, whenever heatOn changes, we would send a signal to real heating equipment somewhere else in the house.
Since we don’t have that available, we will simulate our own heat and demonstrate how we can mix in other asynchronous elements.
We’ll add a new behavior.
        sideEffect(e -> {
          ui.heatStatus.setText("Heat " + (heatOn.value() ? "On" : "Off"));
        });
      });

    behavior()
      .demands(heatOn)
      .runs(ext -> {
        if (heatOn.justUpdatedTo(true)) {
          // turn heat on
        } else if (heatOn.justUpdatedTo(false)) {
          // turn heat off
        }
      });
This new behavior responds to heatOn updates.
It uses .justUpdatedTo() to differentiate changing to true or false.
At this point we want to make an important point about the way state resources work.
Even though the behavior that supplies heatOn calls .update() every time it runs, it doesn’t necessarily update the state resource.
Inside .update(), Behavior Graph uses .equals() to check if the new value is different from the starting value.
If they are the same, the state resource does not actually update.
Therefore, demanding behaviors are not activated.
As an example, if heatOn.value() is currently false, calling heatOn.update(true) will update the resource and activate demanding behaviors. However, if in the next event we also call heatOn.update(true), Behavior Graph will see that it is already true and therefore will not actually update or activate demanding behaviors.
Turning On
We aren’t controlling actual heating equipment. But our ThermostatUI object has some API to simulate this functionality by gradually increasing our heat over time.
        if (heatOn.justUpdatedTo(true)) {
          sideEffect(e -> {
            ui.turnOnHeat(effect -> {
              currentTemperature.updateWithAction(currentTemperature.value() + 1);
            });
          });
        } else if (heatOn.justUpdatedTo(false)) {
This branch creates a side effect which calls a heating API. In this case the API starts a timer and makes callbacks to our provided lambda.
When the timer fires, we create an action to bring new information into Behavior Graph.
In this case, the new information is that currentTemperature has increased by 1.
Note we are accessing currentTemperature.value() outside of a behavior.
Unlike many reactive frameworks, this is fine.
We maintain the integrity of our state by manipulating control flow, not by restricting access.
Turning Off
If you run this program now, the heat will start incrementing but it won’t stop once the heat turns off. We will add an additional side effect for this.
        } else if (heatOn.justUpdatedTo(false)) {
          sideEffect(e -> {
            ui.turnOffHeat();
          });
        }
This side effect calls our API which cancels the timer when the heat turns off.
Now run the code and turn the desired temperature up a few degrees from the current temperature and wait. You will see the current temperature slowly increase until they equal and the heat will turn off.
Behavior Graph Programming
This code is typical Behavior Graph programming style. The path we went through to get here is typical of the Behavior Graph programming process. The important step is learning how to organize code into behaviors.
Control Flow for Free
Behaviors are never called directly, which can feel like a lack of control. This is a fair intuition, but also incorrect. Behavior Graph improves our ability to express the intent of our code. We do not think in terms of “do this now”. Instead we think, “here are the reasons why this should run”.
Behavior Graph determines the behavior that should run next based on which behaviors have been activated and their dependencies. A behavior that may influence another behavior will always run first.
Looking a the behaviors in our Thermostat program and their linked resources we can figure out exactly how things will run. Here’s the sequence of steps when we click the Up button.
- Action:
up.update(), activate Behavior 1 - Behavior 1:
desiredTemperature.update(61), activate Behavior 2, create Side Effect 1 - Behavior 2:
heatOn.update(true), activate Behavior 3, create Side Effect 2 - Behavior 3: create Side Effect 3
- Side Effect 1:
desiredTemperatureSwing label’s text changes to “61” - Side Effect 2:
heatStatusSwing label’s text changes to “Heat On” - Side Effect 3: Create simulated “heating” timer
The status quo approach of organizing around method calls leaves us open to potential errors as dependencies change. With Behavior Graph, if we introduce a new dependency for Behavior 1, the rest of the control flow adapts. Everything will continue to run in the correct order. This is Behavior Graph doing the work for you.
Incremental Adoption
Behavior Graph is not the solution to all programming problems. It is a tool for structuring the event driven logic portion of your software. Feel free to use it as much or as little as you like.
When introducing it incrementally to an exiting codebase, it is easiest to work back from the output.
- Find a place were you update the UI, start an animation, or make a network call.
- Wrap that up in a side effect inside a behavior.
- Then figure out what new information should cause that behavior to run.
- Turn that information into resources.
- Either update those resources inside action blocks or write new behaviors to supply them.
- Repeat.
Congratulations
Congratulations! You have completed the second tutorial. You can see the finished tutorial code here.