Tutorial 3 - Extents
In this tutorial we will create a simple todo list.
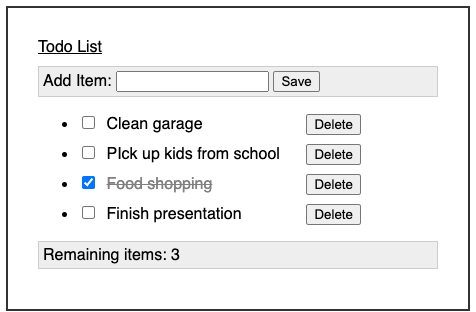
A todo list is interesting because it has user interface elements with independent lifetimes. When we start, our list is empty. The visible interface elements are the header for adding new items and a footer for the remaining items. After we click Save, a new item will appear with a checkbox for completing it, and a button for deleting it. The list as a whole has a longer lifetime than the individual items.
We will implement this by adding and removing Extents from the graph as we add and remove items from our list. This is a powerful and practical technique that gives Behavior Graph a unique expressiveness in the state management realm.
Initial Code
We have created a starter project using JSFiddle. You should use that for this tutorial. It has some simple HTML/CSS to represent the Todo List’s user interface. If you wish to use your own environment you will need to copy the HTML and CSS from this JSFiddle site into your own.
We first want to set up the initial structure.
import * as bg from "https://cdn.skypack.dev/behavior-graph";

class ListExtent extends bg.Extent {
  constructor(graph) {
    super(graph);

  }
}

let graph = new bg.Graph();
let list = new ListExtent(graph);
list.addToGraphWithAction();
Adding Items
New code for you to add or modify will always be highlighted.
In order to add a new item,
class ListExtent extends bg.Extent {
  constructor(graph) {
    super(graph);

    this.save = this.moment();
    document.querySelector('#save').addEventListener('click', () => {
      this.save.updateWithAction(document.querySelector('#new-item-text').value);
    });

    this.behavior()
      .demands(this.save)
      .runs(() => {
      	// do adding here
      });
We create a save moment resource to model the interaction of clicking on the Save button after typing in a new todo.
We use a normal DOM event to call save.updateWithAction() when the button it pressed.
Unlike in previous tutorials, with this moment resource we are passing our update method a parameter which contains the value of the text field. Moments often carry information along with them, in this case we would like to know the textual content of the new item.
Next we create an empty behavior, demanding the save resource.
When save is updated, we want this behavior to create a list item and update the UI.
What is an Item?
A typical way to represent a list item is to create a data structure or object with the relevant data. We can do something similar with a new Extent subclass.
  }
}

class ItemExtent extends bg.Extent {
  constructor(graph, text, list) {
    super(graph);
    this.list = list;
    this.itemText = this.state(text);
  }
}

let graph = new bg.Graph();
let list = new ListExtent(graph);
list.addToGraphWithAction();
We add a new ItemExtent subclass and pass in some information into its constructor.
- A required
Graphinstance - The text of the new todo list item which we store in an
itemTextstate resource - A pointer to the parent
ListExtentinstance which we will use later
Creating an ItemExtent
Back in our ListExtent, inside our behavior we can create an ItemExtent and add it to the graph.
    this.behavior()
      .demands(this.save)
      .runs(() => {
        if (this.save.justUpdated) {
          let item = new ItemExtent(this.graph, this.save.value, this);
          this.addChildLifetime(item);
          item.addToGraph();
        }
      });
We create the new item with the contents of the text field.
Then we call .addChildLifetime(item).
This lets Behavior Graph know that our ListExtent instance will always be around longer than any individual ItemExtent.
This will make it easier to connect behaviors in our ItemExtent to resources in our ListExtent.
We will see more on that later.
Next we call item.addToGraph().
Adding an extent to the graph is a necessary step.
Until we do this, any behaviors or resources in that extent will not perform their expected roles.
Collecting the Items
We also need a way to keep track of these items as they are added.
    this.allItems = this.state([]);

    this.behavior()
      .supplies(this.allItems)
      .demands(this.save)
      .runs(() => {
        if (this.save.justUpdated) {
          let item = new ItemExtent(this.graph, this.save.value, this);
          this.addChildLifetime(item);
          item.addToGraph();
          this.allItems.value.push(item);
          this.allItems.updateForce(this.allItems.value);
        }
      });
allItems is a state resource initialized with an empty array.
We supply it because we will be updating it inside this behavior.
Whenever we create a new item we will append that ItemExtent instance to the end of that array via its .value property and the built in Array.push() method.
It is typical when working with extents that come and go to store them in a state resource or a collection inside a state resource.
Lastly, changing the contents of a collection is not equivalent to calling .update() on the owning resource.
We must update the resource so that demanding behaviors will be notified.
To do this we update the resource with its own contents.
We do this with .updateForce().
We cannot just call .update() because the contents are still the same array instance.
.update() automatically filters out updates when the old value === the new value.
.updateForce() works identically but ignores this check.
This is a common pattern when storing collections inside a resource.
Updating the UI
Adding an item still doesn’t update the UI to match.
Inside our ItemExtent we add some code to create a DOM node.
class ItemExtent extends bg.Extent {
  constructor(graph, text, list) {
    super(graph);
    this.list = list;
    this.itemText = this.state(text);
    this.itemElement = document.querySelector('#templates .list-item').cloneNode(true);
  }
}
This is a normal property that points to a DOM element we create by cloning some template content inside the existing HTML document.
Then inside our ListExtent behavior we can add our list item UI.
      .runs(() => {
        if (this.save.justUpdated) {
          let item = new ItemExtent(this.graph, this.save.value, this);
          this.addChildLifetime(item);
          item.addToGraph();
          this.allItems.value.push(item);
          this.allItems.updateForce(this.allItems.value);
          this.sideEffect(() => {
            document.querySelector('#list').appendChild(item.itemElement);
            document.querySelector('#new-item-text').value = '';
          });
        }
This side effect adds the DOM element that our new ListExtent instance points to.
It also clears the text field so we can add additional items.
Try adding some items by typing in the box and clicking Save.
It seems to add items but we only see empty text.
We can fix that by using our addedToGraph built in resource.
Inside ItemExtent a new behavior.
    this.itemText = this.state(text);
    this.itemElement = document.querySelector('#templates .list-item').cloneNode(true);

    this.behavior()
      .demands(this.itemText, this.addedToGraph)
      .runs(() => {
        this.sideEffect(() => {
          this.itemElement.querySelector('.item-text').innerText = this.itemText.value;
        });
      });
This behavior will run when the ItemExtent is added to the graph updating its innerText HTML content.
We also added a demand on itemText since we would expect that to change the UI if it ever changes as well.
Now running our code and adding a few items will show our list correctly.
Completing Items
There’s a checkbox to complete a todo list item. Checking it at this point does nothing. Let’s fix that.
Inside ItemExtent
    this.list = list;
    this.itemText = this.state(text);
    this.itemElement = document.querySelector('#templates .list-item').cloneNode(true);
    this.completed = this.state(false);
    this.itemElement.querySelector('.completed-checkbox').addEventListener('change', () => {
      this.completed.updateWithAction(!this.completed.value);
    });
We add a new completed state resource that defaults to false.
We also add a DOM event for when the checkbox is checked so we can update completed.
And we add an additional behavior inside ItemExtent
    this.behavior()
      .demands(this.completed, this.addedToGraph)
      .runs(() => {
        this.sideEffect(() => {
          let completedClass = 'completed';
          if (this.completed.value) {
            this.itemElement.classList.add(completedClass);
          } else {
            this.itemElement.classList.remove(completedClass);
          }
        });
      });
This behavior creates a side effect which adds a “completed” class to our HTML item.
This uses the existing CSS to strike-through a completed todo item.
We also include addedToGraph as an additional demand.
It is not strictly necessary at this point because all todo items start off as not completed.
However, it is good practice to use it in behaviors that generate side effects to reflect the current state.
If we were to introduce functionality later for saving and restoring todo lists, we may have items that start in a completed state.
Running this and checking/unchecking todo list items should update the UI accordingly.
Dynamic Behaviors
We will now introduce functionality that takes advantage of Behavior Graph’s ability to dynamically adjust demands and supplies.
Remaining Items
The “Remaining Items” footer of the UI does not update currently. First we need it to respond when adding items.
Inside ListExtent we add a new behavior.
    this.behavior()
      .demands(this.allItems, this.addedToGraph)
      .runs(() => {
        this.sideEffect(() => {
          let count = this.allItems.value.filter(item => !item.completed.value).length;
          document.querySelector('#remaining-count').textContent = count;
        });
      });
This behavior will create a side effect to update the remaining items text to match the current number of non-completed items in the list.
allItems is a demand because we want to run it whenever we add a new item to the list.
Inside the side effect we are able to iterate over the array of ItemExtent instances to check the .value of their completed state resource.
addedToGraph ensures we have the correct starting value in there since it starts out empty.
Now try adding a few items to the list and you will see the remaining items count increment.
Updating Remaining Items
If you try to complete an item however our remaining items count does not change.
This is because that new behavior does not demand the completed resource from our ItemExtent instances.
However, we cannot just add it inside the list of demands because the set of ItemExtent instances changes over time.
Behaviors have another clause for handling these situations.
    this.behavior()
      .demands(this.allItems, this.added)
      .dynamicDemands([this.allItems], () => {
        return this.allItems.value.map(item => item.completed);
      })
      .runs(() => {
        this.sideEffect(() => {
          let count = this.allItems.value.filter(item => !item.completed.value).length;
          document.querySelector('#remaining-count').textContent = count;
        });
      });
.dynamicDemands() is another clause when creating a behavior that lets you specify an additional list of demands that can change.
It takes two parameters.
The first is an array of resources.
Whenever any of those update, it will run the anonymous function in the second parameter.
That function returns a list of additional demands this behavior should have.
Here our dynamic demands clause will return an array containing the completed resource from each ItemExtent instance.
So each time we add a new item, our behavior will adapt so that it will run when the completed resource for that item updates.
Now try running the code. You will see that adding new items updates the remaining items count. And you will see that checking and unchecking the box on those items affects the remaining count as well.
Remaining Items Revisited
Its worth a little extra effort to consider what we just did. The entire remaining items feature is defined by this single behavior.
Let’s compare this with a status quo implementation: methods, properties, and objects. First we might have a method similar to our run block to update the UI
// Hypothetical Code -- Don't type this in
updateRemainingCount() {
  let count = this.allItems.filter(item => !item.completed).length;
  document.querySelector('#remaining-count').textContent = count;
}
That seems reasonable, but its not enough. We need to go inside another method somewhere else in this same class to ensure this gets called when we add a new item. Perhaps it might look like this:
// Hypothetical Code -- Don't type this in
saveButtonPressed(text) {
  let save = new Item(text);
  this.allItems.push(save);
  this.updateRemainingCount();
}
Ok, so the feature is in two places. That’s manageable. Unfortunately, to handle completing, we still need to call in from another place in the code inside the Item class.
// Hypothetical Code -- Don't type this in
completeChecked(checked) {
  this.completed = checked;
  this.updateRemainingCount();
}
Now our feature is spread across multiple classes. And when we add a way to remove items we will need to involve another code-path. This type of spread out logic is a real challenge for developers. It is incredibly easy to miss a case.
Production software is significantly more complex than this trivial example. Most developers are swimming in control flows like this. Behavior Graph lets us collect the “what” and the “why” all together in the same behavior. The problem literally disappears.
Deleting Items
We also have a Delete button on each list item which does nothing currently. We will fix that now.
Inside ItemExtent we add some button click handling.
    this.itemElement = document.querySelector('#templates .list-item').cloneNode(true);
    this.completed = this.state(false);
    this.itemElement.querySelector('.completed-checkbox').addEventListener('change', () => {
      this.completed.updateWithAction(!this.completed.value);
    });
    this.itemElement.querySelector('.item-delete').addEventListener('click', () => {
      this.list.removeItem.updateWithAction(this);
    });
This takes a DOM event and updates the removeItem resource on ListExtent (which we haven’t added yet).
It is common to interact with resources on other extents and a source of conceptual power.
Here we are saying, “this list item is requesting to be removed.”
Note that each ItemExtent’s Delete button updates the same list.removeItem resource.
We are allowed to update resources from multiple actions because only one action will happen during a single event.
Now, inside ListExtent,
    this.allItems = this.state([]);
    this.removeItem = this.moment();

    this.behavior()
      .supplies(this.allItems)
      .demands(this.save, this.removeItem)
      .runs(() => {
        if (this.save.justUpdated) {
          let item = new ItemExtent(this.graph, this.save.value, this);
          this.addChildLifetime(item);
          item.addToGraph();
          this.allItems.value.push(item);
          this.allItems.updateForce(this.allItems.value);
          this.sideEffect(() => {
            document.querySelector('#list').appendChild(item.itemElement);
            document.querySelector('#new-item-text').value = '';
          });
        } else if (this.removeItem.justUpdated) {
          let item = this.removeItem.value;
          item.removeFromGraph();
          this.allItems.update(this.allItems.value.filter(listItem => listItem !== item));
          this.sideEffect(() => {
            document.querySelector('#list').removeChild(item.itemElement);
          });
        }
      });
These changes make up the remove item feature.
First we have a new removeItem moment resource.
removeItem models the concept of “a request to be removed happened”.
We add removeItem as an additional demand on our allItems behavior.
This causes the behavior to run when a user clicks on a Delete button.
It is common to refer to behaviors by the resources they supply.
This is because a behavior uniquely supplies those resources.
In this case we call this the allItems behavior.
We are modifying this behavior because removing an item affects the list in allItems.
We could not put this logic in another behavior because a resource can only be supplied by one behavior.
Updating a resource can only happen in the one behavior that supplies it.
Inside the runs block we add new checks for save.justUpdated and removeItem.justUpdated.
It is a common pattern to iterate through .justUpdated checks of the various demands to determine what happened.
In this case we remove the item from the list by building a new list without the item to remove.
So we do not need to call .forceUpdate() like we did when adding the item.
Our side effect ensures that the UI updates as well.
Also note that we call.removeFromGraph() on the removed ItemExtent.
Extents should always be removed from the graph if they are no longer needed otherwise their behaviors will continue to run.
Remaining Items Re-revisited
You may also notice that the remaining items count now goes down if you remove an item that hasn’t been completed yet.
We get this for free because we defined the remaining items on the allItems list.
If we were just using method calls to implement delete, we very likely would have removed the item from our list directly and then had to remember to call some updateRemainingCount() which could have easily been forgotten.
This ability to make chances without introducing additional complexity is a hallmark of programming with Behavior Graph. Once you’ve experienced it a few times you will find it difficult to give up.
Editing
Now we will introduce some editing functionality. This will cover some additional uses of dynamic behaviors. We will allow the user to click on a particular todo list item to select it. While selected, the user can edit the text inside the main text field.
Selecting
The first step is to use a DOM event to identify when we have selected a particular item.
Inside ItemExtent add another handler.
    this.itemElement.querySelector('.item-delete').addEventListener('click', () => {
      this.list.removeItem.updateWithAction(this);
    });
    this.itemElement.querySelector('.item-text').addEventListener('click', () => {
    	this.list.selectRequest.updateWithAction(this);
    });
selectRequest updates with the list item that was clicked as its .value.
Inside ListExtent we add the related resources and a corresponding behavior.
    this.allItems = this.state([]);
    this.removeItem = this.moment();
    this.selectRequest = this.moment();
this.selected = this.state(null); this.behavior()
.supplies(this.selected)
.demands(this.selectRequest)
.runs(() => {
this.selected.update(this.selectRequest.value);
});Clicking on an item sets our new selected resource as the item that was just clicked.
Selected
Now we want our items to visually reflect when they are selected.
We can do this by demanding this resource in a behavior in each ItemExtent.
	this.behavior()
      .demands(this.list.selected)
      .runs(() => {
      	let selected = this.list.selected.value === this;
        this.sideEffect(() => {
          let selectedClass = 'selected'
          if (selected) {
          	this.itemElement.classList.add(selectedClass);
          } else {
            this.itemElement.classList.remove(selectedClass);
          }
        });
      });
When the selected state resource inside ListExtent updates, this behavior on every item will run.
They each demand this.list.selected.
Depending on if the item is the one that is selected we will change the UI accordingly.
We want to refer back to the beginning where we called .addChildLifetime(item) inside ListExtent.
          let item = new ItemExtent(this.graph, this.save.value, this);
          this.addChildLifetime(item);
          item.addToGraph();
This line says that the list will always be around when the item is.
This gives us permission to add this.list.selected, a resource in ListExtent, as a demand on the behavior inside each ItemExtent.
Behavior Graph ensures that we don’t link to resources that may no longer be part of the graph and it uses lifetimes as a way to manage that.
You can now try out this code by clicking on different items.
Notice that we can take a list of many items and click on different ones and watch it switch. Each time, one of those behaviors adds the ‘selected’ CSS class while all the rest remove the ‘selected’ class. Removing a class when its already not there is valid and simplifies our logic.
Deselect
Its easy enough to introduce deselecting by clicking on the already selected element.
Inside ListExtent we modify our selected behavior.
    this.behavior()
      .supplies(this.selected)
      .demands(this.selectRequest)
      .runs(() => {
      	if (this.selected.value == this.selectRequest.value) {
          this.selected.update(null);
        } else {
        	this.selected.update(this.selectRequest.value);
        }
      });
We check if the currently selected item is the one that was just clicked on and set it to null in that case.
This communicates that nothing should be selected.
Try running now and clicking on an item multiple times.
Updating The Text Field
Now we want to introduce editing. Let’s try updating the main text field when we select an item so we can edit it.
    this.behavior()
      .supplies(this.selected)
      .demands(this.selectRequest)
      .runs(() => {
      	if (this.selected.value == this.selectRequest.value) {
          this.selected.update(null);
        } else {
        	this.selected.update(this.selectRequest.value);
        }

        if (this.selected.justUpdated) {
          this.sideEffect(() => {
            let textField = document.querySelector('#new-item-text');
            textField.value = this.selected.value === null ? '' : this.selected.value.itemText.value;
            let actionText = document.querySelector('#action');
            actionText.innerText = this.selected.value === null ? 'Add' : 'Edit'
          });
        }
      });
Whenever selected updates, we run this new side effect.
It copies over the text of the item into the text field.
It also updates the UI to indicate that we are editing and not adding.
Conversely, when selected updates to null, it puts our UI state back to an Add mode.
Preventing Adding
When we are in editing mode, the save button should cause the text in our item to update. However right now it will still create a new item. We want to prevent that from happening when we are in editing mode.
    this.behavior()
      .supplies(this.allItems)
      .demands(this.save, this.removeItem)
      .runs(() => {
        if (this.save.justUpdated && this.selected.traceValue === null) {
          let item = new ItemExtent(this.graph, this.save.value, this);
          this.addChildLifetime(item);
          item.addToGraph();
          this.allItems.value.push(item);
At the time we click the Save button, we want to know if we are in editing mode or not.
We could check selected.value to see if it is null (ie not editing).
However, here we use selected.traceValue instead.
.traceValue is the value of the resource at the beginning of the graph event (the instant the action started).
So if selected updates this event, .traceValue will still return what it was before it changed.
This also removes the requirement that we demand selected in this behavior.
Here we just care if an item is already selected or not, not that something was “just selected”.
So we don’t need it as a demand.
.traceValue of any resource is always accessible by any behavior without demanding (or supplying) it.
The if check ignores the save click when there’s something already selected.
Making Changes
Now we can add a new behavior inside ListExtent that responds to our save and updates the text of the selected item.
        }
      });

    this.behavior()
      .dynamicSupplies([this.allItems], () => {
        return this.allItems.value.map(item => item.itemText);
      })
      .demands(this.save)
      .runs(() => {
      	if (this.save.justUpdated && this.selected.traceValue !== null) {
          this.selected.traceValue.itemText.update(this.save.value);
        }
      });

    this.behavior()
      .demands(this.allItems, this.addedToGraph)
This new behavior uses .dyanmicSupplies().
This is a clause we haven’t seen before.
It does work similarly to .dynamicDemands().
In this behavior, we update our supplies to be the itemText resource from each ItemExtent instance.
Whenever we add our remove an item, this behavior will update its supplies.
We will supply all of them because any one of them might become selected.
When the user clicks the Save button, this behavior will update the itemText on the selected item to whats inside the text field.
Notice that we use selected.traceValue again here, so it is not part of the demands.
We want which item was selected at the time save was updated.
We also do not need this behavior to run when selected updates.
Notice that all we do is update itemText.
We already have a behavior that knows how to change that UI when we change the text.
It is common to make these kinds of changes and see everything work as expected.
Run the code and you will see your working todo list.
Challenge
After saving our changes, the item remains selected. It might be a better user experience to exit editing mode after saving. Can you implement this?
Try your best before looking at the answer.
Hints:
- You can do this by modifying a single behavior.
- Which behavior is responsible for
selected? - Which resource updates when we click the Save button?
Answer: Clearing Post Save
We can modify our selected behavior inside ListExtent.
    this.behavior()
      .supplies(this.selected)
      .demands(this.selectRequest, this.save)
      .runs(() => {
      	if (this.selectRequest.justUpdated) {
      	  if (this.selected.value == this.selectRequest.value) {
            this.selected.update(null);
          } else {
          	this.selected.update(this.selectRequest.value);
          }
        } else if (this.save.justUpdated) {
          this.selected.update(null);
        }
Now our selected behavior also runs and deselects the current item when the Save button is pressed.
Here see again the common pattern of checking various resources’ .justUpdated property inside a behavior.
Just before adding this feature we used selected.traceValue in a few behaviors.
This change here is an additional motivation for that.
If we used selected.value in those behaviors it means they would demand selected which is supplied by this behavior.
Which means they would run after this behavior.
Which means by they time they ran, selected.value would be null.
We don’t want what selected changes to, we want what it was at the start.
This is what traceValue provides.
Congratulations
Congratulations! You have completed the third tutorial. You can see the finished tutorial code here.